

Rig a 9 to 10 foot medium-heavy rod with a line-counter reel spooled in 20 to 30 lb mainline, add a banana sinker on a slide above a barrel swivel, run a 5 to 8 foot leader with two octopus hooks in the 3/0 to 5/0 range, and thread on a fresh, brined cut-plug herring. Tie it, drop it boat-side, and check the roll before it ever hits real water.
TL;DR:
- Using a line-counter reel provides precise depth control, crucial for repeatedly hitting the same fish-holding zones, especially in structured areas.
- Keep leaders between 5 and 8 feet, adjusting length based on water clarity, and strengthen or shorten the leader to match fishing conditions and target salmon size.
- Proper bait preparation, including brining and cutting a beveled plug that matches water conditions, directly impacts the bait’s natural spin and presentation.
- Adjust sinker weight based on current, wind, and depth, preferring lighter weights in calmer water to maintain a natural bait roll and improve bite detection.
- Regularly perform a quick bait-spin check before each drop to ensure lively, natural bait movement, which is essential for triggering strikes.
Table of Contents
- What Is a Salmon Mooching Setup?
- Choosing, Brining, and Cutting Your Herring
- How Do You Rig a Salmon Mooching Setup?
- How Do You Fish a Mooching Rig Effectively?
- Fixing Common Mooching Problems on the Water
- Field Notes From Pacific Northwest Mooching Trips
- An Editorial Take on What Actually Makes Mooching Work
- Shop the Exact Setup From This Guide
- Sources
- FAQ
What Is a Salmon Mooching Setup?
A salmon mooching setup is the rod, reel, line, and terminal tackle combination built to fish live or cut bait vertically, letting current and rod action do the work instead of a moving boat. It is the traditional Pacific Northwest technique anglers used long before downriggers and dodger-flasher combos took over, and it still out-fishes trolling on days when salmon are holding tight to structure instead of roaming open water.
The gear matters, but not for the reasons most beginners assume. Every component in a mooching rig exists to produce one thing: a tight, natural spin on your bait that mimics a dying herring. Get the spin right and mediocre gear still catches fish. Get the spin wrong and the fanciest rod in your boat won’t save you.
Rod and reel: why length and action aren’t negotiable
An 8.5 to 10 foot medium-heavy rod is the standard for a reason. That length gives you the long, smooth lift needed to work bait through the water column without yanking it into an unnatural spiral. Go shorter, say a 7-foot bass rod repurposed for salmon, and you lose the sweeping motion that makes mooching different from just jigging a weight up and down.
Stiffer blanks earn their keep in current or when you’re fishing heavier sinkers past 4 ounces. Softer tips shine in calm water with light 2 to 3 ounce weights, where you want every subtle twitch to telegraph up the blank.
Reel choice splits into two camps:
- Line-counter reels display exact footage, which lets you return to the precise depth where a fish just bit. This is the single biggest advantage a line counter offers over guessing.
- Single-action reels are the old-school choice, prized for their direct feel and simplicity, but they demand you count cranks or mark line by hand.
If you’re fishing new water or a boat full of rods, the line counter wins every time. It turns a lucky strike into a repeatable pattern.
Mainline, leader, and knots
Braided mainline in 40 to 60 lb test is common because it carries almost no stretch, transmitting even soft bites straight to your hand. Some anglers prefer straight monofilament in 20 to 30 lb for its shock absorption, especially with light tippet leaders, though it sacrifices some sensitivity.
Your leader is where pound-test actually touches the fish. Washington Department of Fish and Wildlife guidance on drift rigging supports keeping leaders in the 5 to 8 foot range, built from 20 to 30 lb monofilament or fluorocarbon. Bump toward the heavier end when kings are the target; they pull harder and abrade line faster on structure.
Hooks, swivels, and sinkers
Octopus and circle hooks in 3/0 to 5/0 dominate mooching leaders because their shape keeps the herring’s natural curve intact instead of stiffening it. A fixed top hook is simpler to tie, but a sliding top hook lets you match hook spacing to the exact length of the bait in your hand, which matters more than most anglers realize since bait size varies trip to trip.
Swivels are the unsung hero of a clean mooching rig. Cheap swivels bind up under load and hand you a rat’s nest of twisted line by your third drop. Ball-bearing swivels rotate freely even under tension, and pairing one with a small bead chain swivel between mainline and leader cuts twist dramatically.
Mooching sinkers come in banana or crescent shapes, both designed to slide or hang without spinning the bait themselves. As a rule of thumb, use 2 to 3 ounces in calm water and shallow depths, and climb to 4 to 8 ounces as current, wind drift, or depth increase.
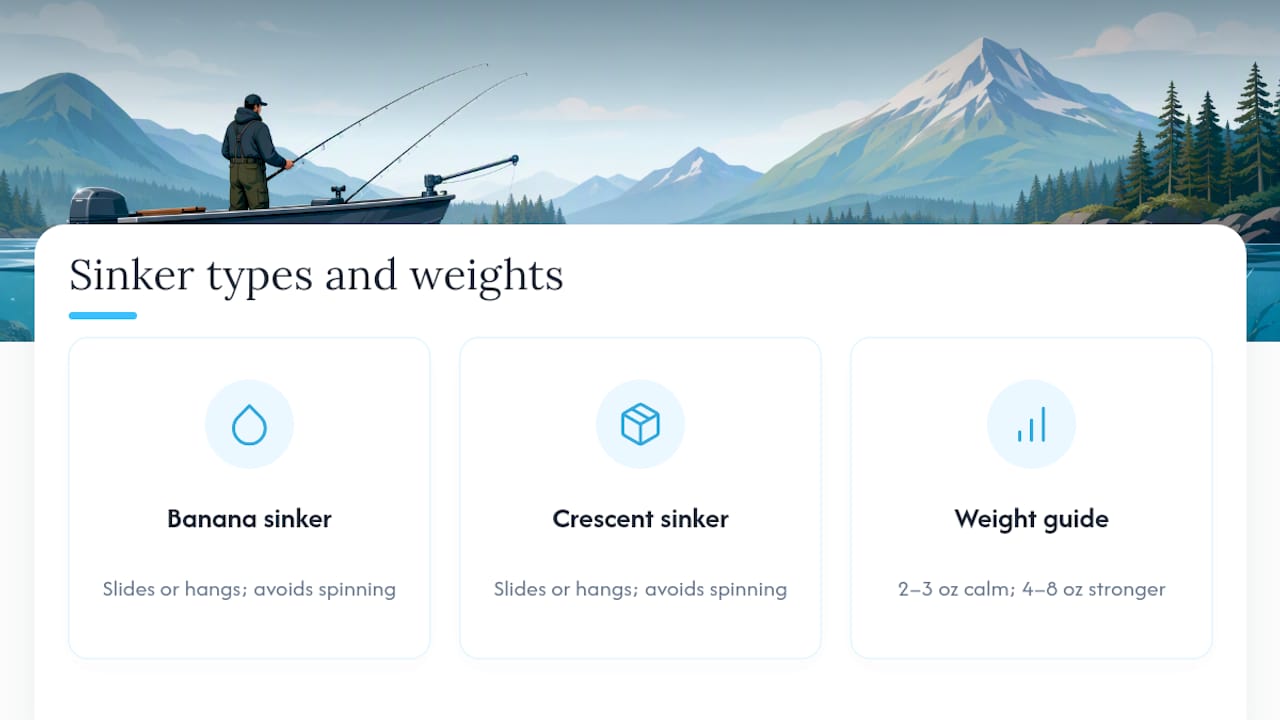
Pro Tip: Carry three sinker weights on quick-change snaps instead of one “do everything” weight. Swapping a sinker takes ten seconds and often fixes a bait that’s spinning too fast or not spinning at all.
Choosing, Brining, and Cutting Your Herring
Whole herring works fine early season when bait is small and salmon aren’t picky, but cut-plug herring produces a tighter, more controllable roll and generally outperforms whole bait once fish get selective. The cut-plug method has become the go-to presentation for serious moochers because it lets you dial in exactly how fast and tight the bait spins.
Brining toughens the flesh so bait survives repeated hook-sets and boat-side checks without turning to mush. A simple ratio works: mix a strong salt brine, roughly a cup of non-iodized salt per quart of water, with a few tablespoons of sugar added to firm the flesh and add a hint of scent appeal. Soak bait overnight in the refrigerator, then pack it in salt or a commercial cure for the boat.
- Select firm, fresh herring with intact scales and no sunken eyes; soft bait never produces a good spin no matter how you cut it.
- Cut the plug at a 45 degree angle just behind the gill plate, removing the head and leaving a beveled face that catches water and initiates the roll.
- Trim the body to 3 to 4 inches for most Chinook and coho work, adjusting slightly longer for larger bait schools.
- Insert the top hook through the beveled face, angling it so the point exits along the cut edge rather than straight through the body.
- Set the trailing hook near the tail, positioned to keep the body curved rather than straight, which is what actually generates spin.
- Test the plug boat-side by lowering it beside the boat and watching the roll before sending it to depth.
Our internal guide on cut-plug herring rigging breaks the cutting angle down further if you want photos alongside the steps.
Pro Tip: If your bait spins too fast and looks unnatural, shorten the trailing hook distance slightly or reduce the cut angle. Too slow or lifeless, and you likely need a sharper bevel or a fresher herring.
The boat-side spin check isn’t optional if you’re serious about results. A bait that looks perfect in your hand can spin sideways or not at all once it hits current, and the only way to know is to look before you drop.
How Do You Rig a Salmon Mooching Setup?
Assembly follows a fixed order every time: sinker slide onto the mainline first, then a barrel swivel, then your leader, then hooks.
- Thread the mooching sinker slide directly onto your mainline so it can travel freely above the swivel.
- Tie a snap swivel below the slide using a Palomar knot, which holds strength better than most alternatives under repeated jerking.
- Attach your 5 to 8 foot leader to the swivel with an improved clinch knot, or snell the leader in advance if you’re pre-tying rigs at home.
- Position the top hook 3 to 4 inches down the leader, sliding it to match your bait’s exact length.
- Tie or slide the trailing hook near the leader’s end, spaced to hold the herring in its curved shape.
- Clip the sinker onto the slide using a snap rather than tying it directly, so you can swap weights in seconds.
A few habits separate anglers who rig once a trip from anglers rigging every twenty minutes:
- Pre-tie a handful of leaders at home the night before and store them on a leader board to skip knot-tying entirely on the water.
- Keep two or three spare sinker slides pre-rigged with snaps so a break-off costs you thirty seconds, not five minutes.
- Carry both fixed and sliding-top-hook leaders. Sliding setups adapt to bait size, fixed setups are faster to tie in a hurry.
Picture the finished rig hanging vertically: mainline runs down to a slide holding a banana sinker, that slide sits just above a small barrel swivel, and below the swivel a mono leader stretches 5 to 8 feet to a curved cut-plug herring pinned by two hooks spaced to match its length. That image is what you’re rebuilding every time a leader breaks or a fish tears up your bait.
How Do You Fish a Mooching Rig Effectively?
The technique itself splits into two approaches, and choosing correctly matters more than any piece of gear in your box. Drift mooching means killing the motor and letting current carry the boat naturally, ideal in tide rips and current seams where fish already hold. Motor mooching means idling forward just fast enough to add subtle action and control your drift angle, useful in dead-calm water or open bays without current to work with.
Drop your bait by free-spooling with light thumb pressure rather than letting it plummet. A controlled drop avoids the tangled mess that happens when slack line piles up faster than the sinker falls. In current, angle your drop slightly upcurrent so the rig has time to settle into position as it sinks past the depth you’re targeting.
Once you hit depth, the real technique begins:
- Lift the rod tip smoothly over 1 to 2 seconds until it reaches roughly a 70 degree angle, then let it fall back under controlled tension rather than dropping it loose.
- Repeat that lift-and-fall cadence continuously; it’s this motion that mimics a dying baitfish and triggers strikes salmon otherwise ignore.
- After finding a productive depth, use your line counter to note the footage and crank back to that exact mark on your next drop.
- As a rough reference, each full crank on most line-counter reels retrieves 18 to 24 inches, so ten cranks off bottom roughly puts you 15 to 20 feet up.
Using a line counter to log strike depth is genuinely the difference between one lucky fish and a boat limit. Once you know salmon are sitting at 45 feet over a specific piece of structure, every angler in the boat can match that depth instead of guessing.
Read your electronics for bait balls, arcs holding near structure, and defined depth bands where marks stack up. Seams where current lines meet, current breaks around points, and drop-offs adjacent to bait schools are classic mooching water. When your sounder shows fish suspended at a consistent depth across multiple passes, that’s your cue to log the footage and fish it repeatedly rather than covering more water.
Fixing Common Mooching Problems on the Water
Most mooching frustration traces back to five fixable issues, and running through them in order saves more fish than any single gear upgrade.
- Bait not spinning: slide the top hook slightly, re-cut the plug angle sharper, or swap in fresher bait. A dead or mushy herring rarely produces a spin no matter how it’s hooked.
- Line twist building up: check your swivels first. A cheap or corroded ball-bearing swivel is the usual culprit, and a bead chain swivel between mainline and leader often solves stubborn twist within a few drops.
- Wind or current picking up: step up your sinker size rather than fighting the same weight against stronger drift, or shorten your leader slightly to keep the presentation from sailing out of the strike zone.
- Dogfish or bottom-feeders hammering bait: move the rig 10 to 15 feet higher in the water column and drop to a lighter sinker. Salmon still eat well off the bottom, and you’ll burn through far less bait.
- Snagging structure repeatedly: switch to a lighter, breakaway-style sinker connection so a hang-up costs you a $2 weight instead of your whole leader.
Telling a soft bump from a real strike takes reps, but there’s a pattern: dogfish and small bites feel like a light tap-tap that fades, while a salmon strike usually loads the rod steadily and keeps pulling. Wait for that steady load before setting the hook. Setting too early on a soft tap just pulls the bait away from a fish that hasn’t fully committed.
Pro Tip: Keep a spare pre-tied leader with a sliding top hook rigged and ready in your box at all times. When your spin goes bad mid-bite, you swap the whole leader in under a minute instead of re-cutting bait while fish move off.
Field Notes From Pacific Northwest Mooching Trips
Years spent chasing kings and coho through Puget Sound tide rips and the lower Columbia teach you things no gear list covers. The rig on paper and the rig that actually produces on a gray October morning are often two different animals, and the gap is almost always in the small tuning details.
A few things worth carrying in your own notebook:
- Leader length shifts with water clarity more than most anglers admit. Stained water tolerates a shorter 5-foot leader just fine; gin-clear conditions often reward stretching to a full 8 feet.
- Sinker choice on a slow-moving tide should almost always start lighter than you think. Dropping from 4 ounces to 3 ounces on a soft tide can turn a dead presentation into a rolling one.
- The best bite windows tend to cluster around tide changes, when bait gets pushed and disoriented, exactly the condition your cut-plug is designed to imitate.
For readers ready to build out beyond the basics, our guides on best bait presentations for salmon fishing and salmon trolling rigs you can swap fast cover adjacent techniques worth knowing when mooching conditions turn tough. If tying leaders by hand isn’t how you want to spend your evening before a trip, pre-built leader kits with hooks already spaced and snelled save real time on the water without sacrificing the tuning control that makes mooching work.
An Editorial Take on What Actually Makes Mooching Work
Most gear guides oversell hardware and undersell attention. The research backs a simpler truth: overcomplicating a mooching rig is the single most common mistake anglers make, and it usually comes from a belief that better swivels or pricier rods will fix a bad presentation. They won’t. A $15 rod with a properly cut, well-brined herring rolling tight beats a $400 setup with lazy bait every time.
Conventional advice spends too much time on rod specs and not enough on the boat-side spin check. That five-second habit, looking at your bait before it hits depth, prevents more blown trips than any hook upgrade. If you take one thing from this guide, prioritize the roll over the rig. Buy solid components once, then spend your energy learning what a good spin looks like and fixing it fast when it isn’t there.
— Nick
Shop the Exact Setup From This Guide
Building this rig from scratch is faster when the components are already sitting in your tackle box instead of scattered across three different stores. There are hooks, swivels, and sinker slides available that are sized and built specifically for Pacific Northwest salmon water rather than generic tackle-aisle gear.

Our terminal tackle and components collection covers the octopus hooks, ball-bearing swivels, and sinker slides you need to tie the exact rig outlined above, so you’re not hunting three aisles for parts that should live in one box. Pair that with a brine kit before your next trip and you’ll have bait ready the night before instead of scrambling at 5 AM. Browse the collection, grab what’s missing from your box, and get the rig tied before the tide turns.
Sources
- Mooching for Salmon — Trout and Steelhead
- Washington Department of Fish and Wildlife — Salmon basics
FAQ
How Do You Set Up a Mooching Rig for Salmon?
Thread a mooching sinker slide onto your mainline, tie a barrel swivel below it, attach a 5 to 8 foot leader with an improved clinch or snelled knot, then rig two octopus hooks sized 3/0 to 5/0 to hold a cut-plug herring in a natural curve.
What Is the Best Rod for Salmon Mooching?
An 8.5 to 10 foot medium-heavy rod paired with a line-counter reel is the standard choice, since the length allows a smooth lift-and-fall cadence and the counter lets you return to a productive depth.
What Is the Best Overall Setup for Salmon Fishing?
The right setup depends on technique: mooching calls for a medium-heavy rod, line-counter reel, 20 to 30 lb leader, and cut-plug bait, while trolling setups favor shorter, stiffer rods paired with downriggers and flashers. A terminal tackle line is available that covers the mooching side of that equation.
Is Trolling or Mooching Better for Salmon Fishing?
Neither wins outright. Trolling covers more water at a steady speed to locate fish, while mooching excels once you’ve found salmon holding tight to structure or a specific depth band and want a natural, vertical presentation.
How Do You Fix Bait That Won’t Spin Properly?
Slide the top hook to better match the bait’s length, re-cut the plug with a sharper bevel angle, or swap in fresher herring, then run a quick boat-side check before dropping the rig back to depth.
0 comments