

The three most reliable saltwater bottom fishing rigs for U.S. waters are the sliding fish-finder (egg-sinker) rig, the high-low (double dropper) rig, and the three-way/dropper-loop deep rig. For most inshore and nearshore bottom work, the sliding fish-finder is your go-to — it gives you clean bite sensitivity, a low-tangle profile, and you can dial it in for any depth or current in under two minutes. Here’s what you need to know before you drop a line:
- Sliding fish-finder rig: Best all-around choice for sandy and mixed-bottom inshore fishing. The sinker slides freely on the mainline, so fish feel zero resistance when they pick up the bait.
- High-low (double dropper) rig: Two hooks, one drop. Deadly on porgies, sea bass, and snapper when fish are stacked on structure.
- Three-way / dropper-loop deep rig: Built for wrecks, deep reefs, and tilefish drops. Keeps bait elevated off the bottom and handles heavy current.
- Circle hooks: Widely mandated or strongly recommended for saltwater bottom fishing across U.S. fisheries. Use a steady crank to set, never a hard yank. Size up two to three sizes compared to J-hooks.
- Highclasstackleco carries the terminal tackle and components you need to build every rig on this list.
Table of Contents
- ## 1. What are the core saltwater bottom fishing rigs?
- ## 2. How do you choose the right terminal tackle?
- ## 3. How to tie the three must-know rigs step by step
- ## 4. Which rig works best for your target species and conditions?
- ## 5. How do you fish a bottom rig once it’s deployed?
- ## 6. Quick fixes for the most common rig problems
- ## 7. Assemble-and-go rig recipes by target group
- ## 8. What does the research say about circle hooks, leaders, and breakaway sinkers?
- Key Takeaways
- Why simple rigs catch more fish than complex ones
- Stock your rig kit from Highclasstackleco
- Authoritative sources and where to check local rules
## 1. What are the core saltwater bottom fishing rigs?
Every serious bottom angler needs to know six rigs. They cover the full range of depths, species, and structure you’ll encounter from the Pacific Northwest coast to the Gulf and Atlantic.
Sliding fish-finder (egg-sinker) rig
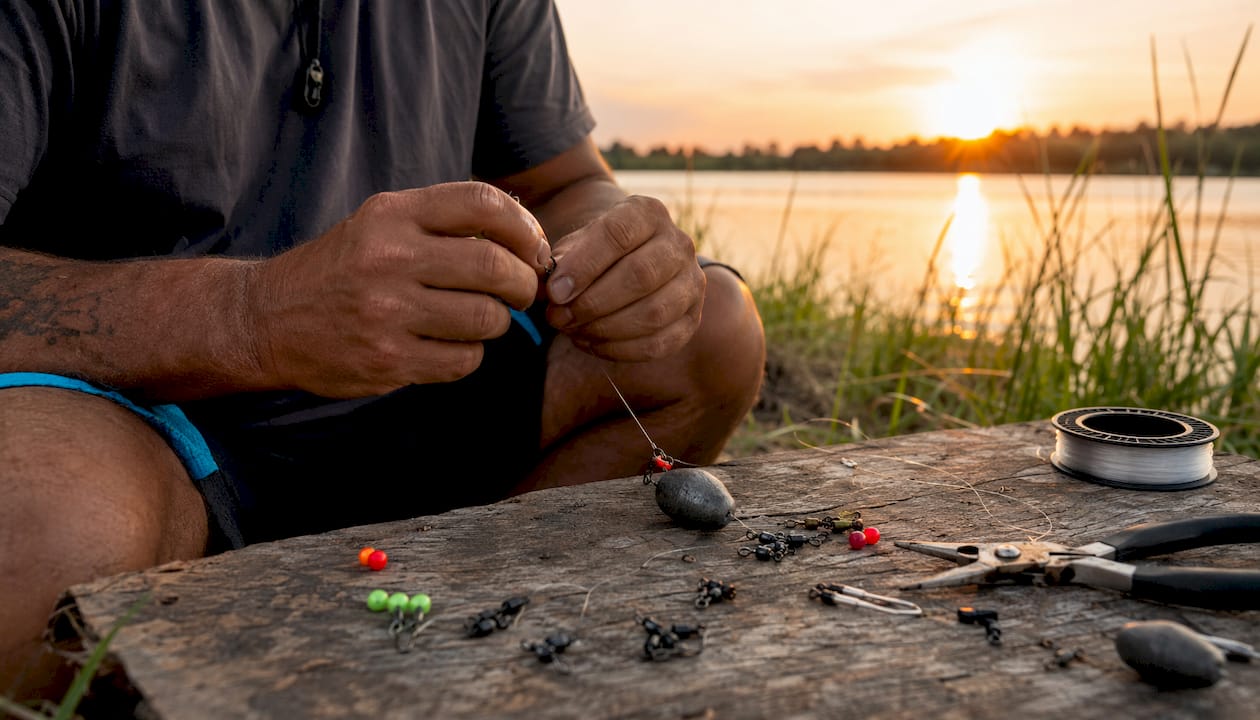
An egg sinker threads directly onto the mainline above a barrel swivel. The swivel stops the sinker and connects to a 12–36-inch leader and hook. Because the sinker slides freely, a fish picks up the bait and moves without feeling weight. That sensitivity is why this rig dominates inshore work for flounder, redfish, and snapper on sandy or grassy bottoms. The trade-off: it can roll in heavy current, so swap to a bank or torpedo sinker when the tide runs hard.
High-low (double dropper) rig
Two short dropper loops tied at intervals on a single leader, each holding a hook, with the sinker at the bottom. You cover two depths in one drop, which is a real advantage when fish are suspended just off the bottom. Dropper-loop and double-dropper rigs are among the most versatile for bottom species and adapt easily to local hook-count rules. Downside: two hooks mean double the tangle risk, especially in current.
Carolina / long-leader rig
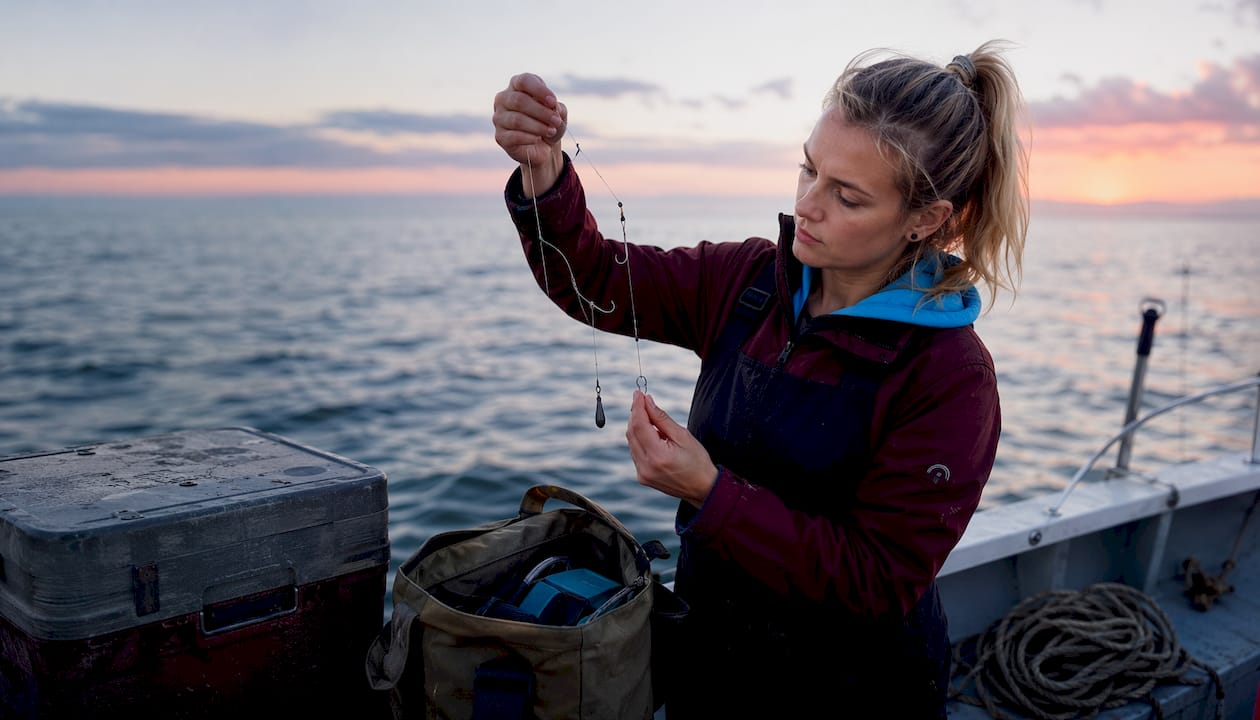
A sliding sinker on the mainline, a bead, a swivel, and then a long fluorocarbon leader of 24–48 inches or more to a single hook. The extra leader length lets live bait swim naturally away from the sinker, which is a major advantage on pressured reef systems where fish have seen every rig in the tackle shop. Use it when bites dry up on a standard fish-finder setup.
Three-way / knocker rig
A three-way swivel connects the mainline, a short sinker dropper, and a longer hook leader. The sinker hangs below the hook, keeping bait elevated off the bottom. This is the standard choice for grouper and snapper over hard structure, and it handles current better than a sliding rig because the sinker anchors the whole presentation.
Chicken rig / deep-drop multi-hook rig
Multiple hooks on long gangion-style droppers above a heavy sinker, sometimes with glow beads or squid skirts. Built for tilefish, swordfish, and deep-drop species at 600–1,500 feet. Heavy gear, electric reels, and 24–32 oz or heavier sinkers are standard at those depths.
Dropper-loop rig
Loops tied directly in the leader create hook attachment points without additional hardware. Clean, strong, and easy to rebuild on the water. Widely used for rockfish and lingcod along the Pacific Coast, where a two-hook dropper-loop setup on a single leader is a classic rockfish bottom rig setup.
## 2. How do you choose the right terminal tackle?
Hooks: circle vs. J-hook
Circle hooks are the right call for most U.S. saltwater bottom fishing. They improve hook-up location, reduce gut-hooking, and boost post-release survival. When you switch from J-hooks to circle hooks, size up two to three sizes to maintain effectiveness on larger bottom species. A 4/0 J-hook becomes a 6/0 or 7/0 circle. For trophy bottom species, some offshore setups run circles up to 10/0 or larger.
Circle-hook note: Many U.S. federal and state fisheries now require non-offset circle hooks for certain species and gear types. Check NOAA and your state fishery regulations before you head out — rules vary by region and target species.
Leader materials and pound-test
Braid mainline paired with a mono or fluorocarbon leader is the standard saltwater bottom fishing tackle setup. Fluorocarbon is nearly invisible underwater and resists abrasion on reef and rock, making it the better choice for clear-water or pressured fisheries. Experienced captains recommend 40–50 lb fluorocarbon leaders in pressured or clear-water reef conditions for stealth and better bite rates. For trophy bottom species, leaders of 125 lb or greater are common in some offshore approaches, but midweight leaders handle most reef species without sacrificing bite rates.
For the offshore saltwater tackle side of things, a 30–65 lb braid mainline with a 20–80 lb fluorocarbon leader covers the majority of bottom fishing situations from inshore to nearshore reefs.
Sinkers: match weight to depth and current
| Condition | Recommended Sinker Weight | Best Sinker Type |
|---|---|---|
| Shallow inshore (<50 ft, light current) | 4–8 oz | Egg, pyramid |
| Moderate depth (50–150 ft) | 8–16 oz | Bank, torpedo |
| Deep reef / wreck (150–300 ft) | 12–24 oz | Bank, cannonball |
| Extreme depth or heavy current | 24–32 oz+ | Torpedo, cannonball |
Sinker weights scale with depth and current; streamlined torpedo or bank sinkers hold bottom better in strong current than round egg sinkers.
Swivels and snaps
Use barrel swivels rated at least as strong as your leader. Three-way swivels connect the mainline, sinker dropper, and hook leader cleanly. Crane swivels handle more torque for deep drops. Avoid cheap swivels — a failed swivel at 200 feet means losing the whole rig.
Pro Tip: Add a small bead between the egg sinker and the swivel on a sliding rig. It protects the knot from the sinker’s impact and keeps the swivel from getting jammed inside the sinker.
## 3. How to tie the three must-know rigs step by step
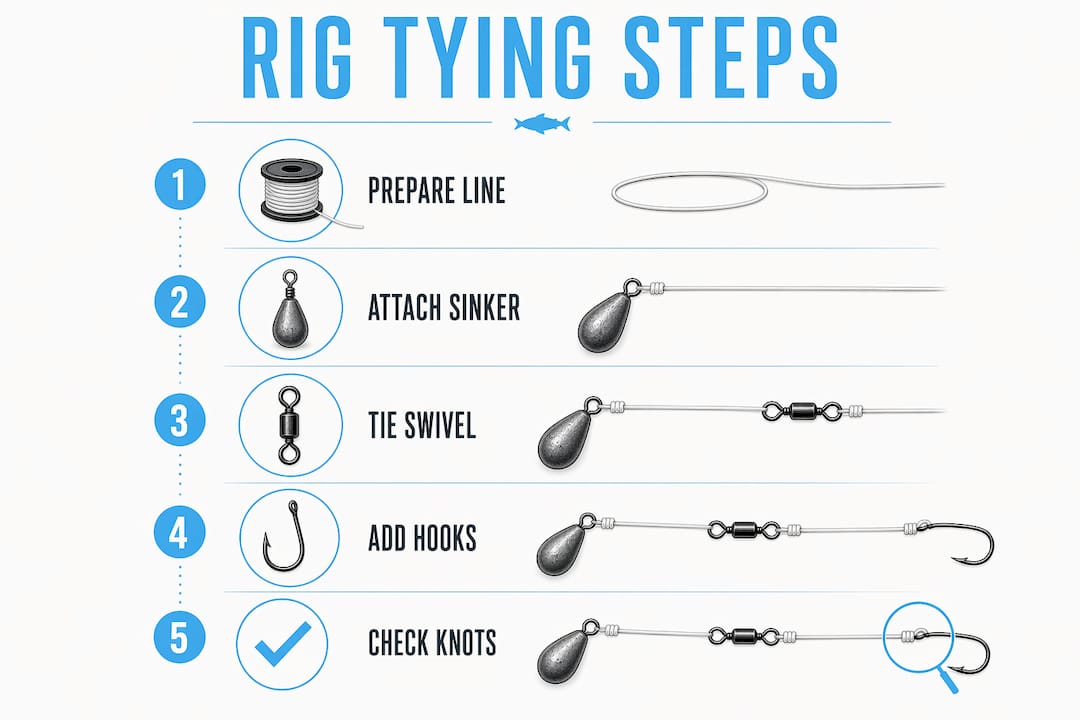
Rig 1: Sliding fish-finder (egg-sinker) rig
Materials: 30–50 lb braid mainline, 1 egg sinker (4–8 oz), 1 bead, 1 barrel swivel (50 lb), 24–36 in of 20–40 lb fluorocarbon leader, 1 circle hook (5/0–8/0).
- Thread the egg sinker onto your mainline, point first.
- Thread the bead onto the mainline below the sinker.
- Tie the barrel swivel to the mainline using a Palomar knot (double the line, pass through the swivel eye, tie an overhand knot, pass the loop over the swivel, and pull tight).
- Attach the fluorocarbon leader to the other end of the swivel with an improved clinch knot (5–7 wraps, thread back through the first loop and the big loop, pull firm).
- Tie the circle hook to the leader end using a snell knot for maximum hook-up angle, or a Palomar for speed.
- Check: sinker slides freely above the swivel, bead seats between sinker and swivel, knots are fully dressed.
Rig 2: High-low (double dropper) rig
Materials: 40–60 lb mono or fluorocarbon leader (36–48 in), 2 circle hooks (4/0–6/0), 1 bank sinker (6–12 oz), 1 barrel swivel (60 lb).
- Tie the barrel swivel to your mainline with a Palomar knot.
- Attach the leader to the swivel’s lower eye with an improved clinch knot.
- Tie a dropper loop 8–10 inches from the top of the leader: form a loop, wrap it around itself 5–6 times, push the center of the loop through the middle opening, and pull both ends to tighten.
- Tie a second dropper loop 8–10 inches below the first.
- Clip or tie a circle hook to each loop using a short 3–4 inch piece of leader and an improved clinch knot.
- Tie the bank sinker to the bottom of the leader with a uni knot (pass through the eye, loop back, wrap 4–6 times, pull tight).
- Check: both hooks hang clear of each other, sinker hangs below both hooks.
Rig 3: Three-way / dropper-loop deep rig
Materials: 50–80 lb braid mainline, 1 three-way swivel (80 lb), 12–18 in of 15–20 lb mono for sinker dropper, 1 torpedo sinker (12–24 oz), 24–48 in of 60–80 lb fluorocarbon leader, 1 circle hook (7/0–10/0).
- Connect the mainline to the three-way swivel with a Palomar knot.
- Attach the sinker dropper (lighter mono) to the bottom eye of the swivel with an improved clinch knot.
- Tie the torpedo sinker to the dropper with a uni knot.
- Connect the fluorocarbon leader to the third swivel eye using an Albright Special: double the leader back 10 inches, lay the braid alongside it, wrap the braid around both strands of the leader 10–12 times, thread the braid back through the loop at the top, and gradually tighten by pulling both ends evenly. Uneven tightening lets braid cut the leader under sudden load.
- Tie the circle hook to the leader end with a snell knot.
- Check: sinker dropper is lighter than the main leader (breakaway function), all knots fully dressed and trimmed.
Key knots summary:
- Palomar: mainline to swivel, hook to leader (fastest, strongest for braid)
- Improved clinch: leader to swivel, hook to mono/fluoro
- Uni knot: sinker attachment, loop connections
- Dropper loop: in-line hook attachment on high-low rigs
- Snell: circle hooks (improves hook-up angle)
- Albright Special: braid-to-mono or braid-to-fluoro connections for deep drops
## 4. Which rig works best for your target species and conditions?
| Target / Condition | Best Rig | Sinker Weight | Leader Length | Bait |
|---|---|---|---|---|
| Shallow inshore (flounder, redfish) | Sliding fish-finder | 4–6 oz | 24–36 in | Cut mullet, shrimp |
| Reef / snapper (50–150 ft) | High-low or Carolina | 8–12 oz | 36–48 in fluoro | Live pinfish, squid |
| Grouper / wreck (100–300 ft) | Three-way / knocker | 12–20 oz | 24–36 in heavy fluoro | Live blue runner, cut bait |
| Rockfish / lingcod (structure) | Dropper-loop | 8–16 oz | 18–30 in | Squid, cut herring |
| Sea bass / porgies | High-low | 6–10 oz | 18–24 in | Clam, squid, cut crab |
| Tilefish / deep drop (600+ ft) | Chicken / multi-hook | 24–32 oz+ | 36–60 in | Squid, mackerel |
Live baits like blue runners, pinfish, and pilchards consistently outperform dead baits for snapper and grouper. Cut squid and clam work well for sea bass and porgies, which are less selective.
Rocky and reef structure calls for a three-way or knocker rig with a torpedo sinker. Sandy or muddy bottoms handle egg sinkers without rolling. In strong current, go heavier on the sinker and switch to a streamlined bank or torpedo shape to stay vertical. Maintaining a vertical line is critical for both bite detection and keeping your rig in the strike zone.
## 5. How do you fish a bottom rig once it’s deployed?
Keeping contact with the bottom
Lower the rig until you feel the sinker hit bottom, then crank up one or two turns. That’s your starting position. As the boat drifts, let out line gradually to keep the angle close to vertical. A 45-degree angle means you’re dragging, not fishing. Check contact every 30–60 seconds with a light lift of the rod tip.
On braid, you’ll feel every tap and thump. On mono, bites register as a steady pull or a series of taps. A sliding-sinker rig gives you a clean, unweighted bite feel. A fixed-sinker or three-way rig transmits more structure noise, so learn to distinguish the “tick” of rock from the “pull” of a fish.
Setting circle hooks
Hard yanks pull circle hooks out of a fish’s mouth. Instead, when you feel a solid bite, reel down steadily until the line goes tight, then keep cranking. The hook rolls into the corner of the jaw on its own. If the rod is in a holder, pick it up and crank without lifting the tip sharply. Circle hooks require a steady reel or crank set — that’s the technique, and it works.
Pro Tip: When fighting a fish up from deep structure, keep steady pressure and avoid pumping the rod aggressively. Grouper and rockfish will dive back into structure the moment they feel slack. Reel on the down stroke, hold firm on the up stroke.
## 6. Quick fixes for the most common rig problems
- Sinker snag: If the sinker hangs up, the lighter mono dropper breaks first, saving your hook, leader, and bait. This is the breakaway sinker technique — attach the sinker on 12–15 lb mono so it sacrifices before the rest of the rig. Carry pre-tied sinker droppers to swap in fast.
- Tangled high-low rig: Tangles usually mean the hooks are too long or the dropper loops are too close together. Space loops at least 8 inches apart, keep dropper arms under 4 inches, and check that the swivel spins freely before each drop.
- Lost bait / short bites: Drop hook size by one or two sizes, or switch to a longer, freer-moving leader. Bait thieves like small porgies or pinfish are fast — a smaller hook catches them before they strip the bait.
- Leader abrasion: Run your fingers along the leader after every drop on rocky or reef structure. Any roughness, nicks, or white stress marks mean re-tie before the next drop. Fluorocarbon hides abrasion better than mono, so inspect it carefully.
- Braid twist: Braid doesn’t stretch, so twist builds up fast on spinning gear. Add a quality barrel swivel between mainline and leader, and respool if you feel the braid looping on itself.
## 7. Assemble-and-go rig recipes by target group
Snapper / reef (50–150 ft)
- Mainline: 30–50 lb braid
- Leader: 40–50 lb fluorocarbon, 36–48 in
- Hook: Non-offset circle, 5/0–7/0
- Sinker: Bank or egg, 8–12 oz
- Swivel: Barrel, 50–60 lb
- Knot: Palomar (mainline to swivel), improved clinch (leader to hook)
- Heavy current change: Extend leader to 60 in, switch to torpedo sinker
Grouper / deep wreck (100–300 ft)
- Mainline: 50–80 lb braid
- Leader: 60–80 lb fluorocarbon, 24–36 in
- Hook: Non-offset circle, 8/0–10/0
- Sinker: Torpedo or cannonball, 12–20 oz on 15 lb mono dropper
- Swivel: Three-way, 80 lb
- Knot: Albright Special (braid to fluoro), snell (circle hook)
- Pressured water change: Increase leader to 60 lb fluoro, 48 in
Rockfish / structure (Pacific Coast)
- Mainline: 40–65 lb braid
- Leader: 40–60 lb fluorocarbon, 18–30 in
- Hook: Non-offset circle or octopus, 3/0–5/0
- Sinker: Bank or torpedo, 8–16 oz
- Swivel: Barrel, 60 lb
- Knot: Palomar (mainline), improved clinch (leader)
- Heavy current change: Add a second dropper loop, increase sinker to 20 oz
Surf / pier (sea bass, porgies, croaker)
- Mainline: 15–20 lb mono or 20–30 lb braid
- Leader: 20–30 lb mono, 18–24 in
- Hook: Non-offset circle or J-hook, 2/0–4/0
- Sinker: Pyramid (surf) or bank (pier), 4–6 oz
- Swivel: Barrel, 30 lb
- Knot: Improved clinch throughout
- Pressured water change: Switch to 20 lb fluorocarbon leader, 30 in
Always confirm local hook-type rules before you rig up. NOAA and state fishery pages list current requirements by species and region.
## 8. What does the research say about circle hooks, leaders, and breakaway sinkers?
The case for circle hooks goes beyond regulation. They improve hook placement to the corner of the jaw, which reduces injury and boosts post-release survival for species like grouper and snapper. The technique difference matters: circle hooks require a steady crank set, not a sharp yank. Anglers who switch from J-hooks and keep their old hook-setting habit lose fish. Size up two to three sizes when making the switch to maintain hooking effectiveness on large bottom species.
Leader length has a measurable effect on bite rates in pressured fisheries. Long fluorocarbon leaders of 40–50 lb test improve hookups in clear or heavily fished water by letting bait swim naturally away from the sinker and reducing line visibility. The trade-off is real: longer leaders tangle more easily and demand closer attention to vertical presentation. In some situations, leaders extending dozens of feet are a legitimate tactic on pressured reef systems, but they require experience to manage cleanly.
The breakaway sinker connection is one of the most underused tricks in saltwater bottom fishing. Attaching the sinker on 12–15 lb mono means a snag breaks the sinker free while you keep the hook, leader, and bait. On rocky Pacific Coast structure or Atlantic wreck fishing, this small change cuts rig losses significantly. Pre-tie a handful of sinker droppers before you leave the dock and you can swap a lost sinker in under 30 seconds.
Key Takeaways
The sliding fish-finder rig is the single most versatile saltwater bottom rig for U.S. inshore and nearshore fishing, but pairing it with circle-hook technique and the right leader material is what actually puts fish in the box.
| Point | Details |
|---|---|
| Go-to rig for most situations | The sliding fish-finder (egg-sinker) rig covers the majority of inshore and nearshore bottom fishing scenarios. |
| Circle hooks are the standard | Size up two to three sizes from J-hooks and use a steady crank set; many U.S. fisheries require them. |
| Match sinker weight to depth | Use 4–8 oz for shallow inshore water and 8–32 oz or more for deep reefs and heavy current. |
| Fluorocarbon leaders improve bites | In pressured or clear-water reefs, 40–50 lb fluorocarbon leaders of 36–60 in increase hookup rates. |
| Highclasstackleco for components | Highclasstackleco’s terminal tackle collection covers hooks, swivels, and components for every rig on this list. |
Quick reminders:
- Check NOAA and your state fishery page for circle-hook requirements before every trip.
- Inspect leaders for abrasion after every drop on rocky or reef structure.
- Pick one rig, tie it at home until it’s automatic, then adjust sinker weight and leader length for your local conditions.
Why simple rigs catch more fish than complex ones
Here’s an opinion worth pushing back on: the fishing industry loves to sell complexity. New rig designs, exotic materials, multi-component systems. Most of it is noise. The anglers who consistently put fish on the deck are the ones who’ve mastered two or three rigs so well they can tie them in the dark on a moving boat.
The sliding fish-finder and the high-low dropper rig have been catching bottom fish for decades because they solve the actual problem: getting bait to the bottom, keeping it there, and transmitting a bite to your hand. Everything else is a variation on those two ideas. When you fish the Pacific Northwest coast or any pressured reef system, the fish aren’t impressed by your rig’s complexity. They’re responding to bait presentation, leader stealth, and whether you’re actually on the bottom.
The one upgrade that consistently matters is fluorocarbon. Switching from mono to fluorocarbon leaders on clear-water reefs is not a gimmick. The visibility difference is real, and the bite-rate improvement is something you notice within a few trips. That’s the kind of change worth making. The rest of the time, tie your knots right, use a breakaway sinker on rocky structure, and fish the rig you know cold. Highclasstackleco’s terminal tackle and components are built for exactly this kind of no-nonsense approach to saltwater fishing.
Stock your rig kit from Highclasstackleco
Building solid saltwater bottom rigs starts with having the right components on hand before you leave the dock. Highclasstackleco’s component tackle box packs the hooks, swivels, beads, and hardware you need to build every rig covered in this guide, saving you the last-minute scramble at a bait shop. It’s the kind of grab-and-go kit that makes sense whether you’re heading out for Pacific rockfish or Gulf snapper.
The full Highclasstackleco store carries terminal tackle, flashers, and gear built for real-world West Coast and saltwater conditions. Browse the hooks and components collection, pick up what you need for your target species, and get on the water with a rig you trust. Head to highclasstackleco.com and build your kit today.
Authoritative sources and where to check local rules
Use these resources to verify regulations, dig deeper into technique, and stay current on circle-hook requirements for your fishery:
- NOAA Fisheries / State Fishery Pages: The primary source for circle-hook mandates, seasonal limits, and gear restrictions by species and region. Check your state’s fish and wildlife agency page alongside NOAA for local rules.
- Salt Water Sportsman: Bottom Fishing Rigs and Techniques: Covers circle-hook technique, leader choices, and rig selection for a wide range of U.S. bottom species.
- Salt Water Sportsman: 8 Great Bottom Rigs and Tactics: Detailed rig breakdowns including dropper-loop, three-way, and breakaway sinker methods with knot guidance.
- Florida Sportsman: Best Bottom Rig Variations: Captain-level advice on adapting rigs to current, pressure, and water clarity with specific leader recommendations.
- Salt Water Sportsman: Slow-Pitch Jigging for Rockfish: Advanced vertical presentation techniques for structure fishing; a natural next step once you’ve mastered basic bottom rigs.
- Highclasstackleco Blog: Practical guides on offshore saltwater tackle and terminal gear selection for West Coast and saltwater anglers.
This article is general information for educational purposes. Always confirm current regulations with NOAA Fisheries and your state fish and wildlife agency before fishing.
Recommended
- Offshore Saltwater Tackle Types: 2026 Angler’s Guide – High Class Tackle Co.®
- Best Bait Presentations for Salmon Fishing in 2026 – High Class Tackle Co.®
- Super Bait Secrets: Top Picks for Salmon and Steelhead – High Class Tackle Co.®
- Inlet Fishing Setup: Your Complete Gear Guide – High Class Tackle Co.®
0 comments