

Use a slip-sinker rig when you’re anchored over structure, a short-leader drift rig when you’re covering ground, a Reaper or trap rig when halibut are short-striking, and a hoochie or hair-jig on tight, isolated flats. Circle hooks dominate anchored setups; J-hooks earn their keep on jigging rigs and trap builds. Herring, cut plug, salmon chunks, and squid all catch fish. Start with the slip-sinker if you’re new to bottomfish. It’s the most forgiving rig on the boat.
TL;DR:
- Use a slip-sinker rig for anchored fishing over sandy or muddy bottom, with 8/0 to 12/0 circle hooks and 12 to 32-ounce sinkers depending on depth and current.
- Short leaders of 18 to 30 inches are essential for drift or jigging rigs to reduce slack, with J-hooks replacing circle hooks for active hooksets during jigging.
- Trap and Reaper rigs target short-striking halibut by incorporating heavy J-hooks on strong leader material, but they increase the risk of deep hooks and require careful release handling.
- Small, isolated patches are best tackled with hoochie or hair-jig rigs, which use short leaders, lighter sinkers, and often include glow beads or rattles for attracted fish.
- Use high-quality terminal tackle rated for saltwater loads, and always tie connections carefully, especially when fishing in rocky terrain or dealing with large, thrashing halibut.
Table of Contents
- What Is the Best Halibut Rig Setup for Each Situation?
- Slip-Sinker and Anchored Halibut Rigs: Build, Tie, and Fish
- Drift Rigs and Jigging Rigs: Leader Length, Hook Type, and Presentation
- Trap and Reaper Rigs: Construction and Ethical Considerations
- Hoochie and Hair-Jig Rigs for Isolated Flats and Picky Fish
- Terminal Tackle Guide: Hooks, Leaders, Crimps, Swivels, and Glow Gear
- Knots, Crimps, and the Step-by-Step Tying Sequence
- Choosing the Right Rig for the Conditions in Front of You
- Safety Tips for Handling Halibut Rigs and Hooks
- Why These Rigs Work: A Field-Tested Perspective
- Gear Up: Terminal Tackle for Every Halibut Rig on This List
- Sources
What Is the Best Halibut Rig Setup for Each Situation?
Every halibut rig on this list has a job. Pick the wrong one for the water you’re fishing and you’ll spend the day retying instead of fighting fish. Here’s the fast rundown before we get into the build details.
- Slip-sinker (anchored): The workhorse rig for anchored boats over sand, mud, or gravel. Simple to tie, forgiving on hookup, and easy to adjust when current shifts. Circle hooks in the 8/0 to 12/0 range on heavy test leader suitable for halibut fishing. Best for beginners and multi-angler charter setups.
- Drift rig (short-leader): Built for covering water while the boat drifts with wind or tide. Leaders run shorter, typically 18 to 30 inches, so the bait stays close to bottom without snagging. Works with circle or J-hooks depending on whether you’re baiting passively or working the rod.
- Jigging rig: No bait, just a metal jig or hair jig on a short leader or direct tie. J-hooks are standard here because you’re setting the hook yourself on the take. Leader test in the 60 to 100 lb range, since you’re fishing tighter to the boat and don’t need the stretch a longer leader gives.
- Reaper/trap rig: Built for halibut that nip tails and steal bait without ever finding the main hook. Heavy J-hooks in a large size range on strong mono or fluorocarbon leader material. Converts more strikes but carries a real deep-hooking risk that anglers need to plan for.
- Hoochie/hair-jig: A skirted or hair-dressed presentation for picky fish on small, isolated patches. Lower drag than a bait rig, easier to work vertically, and it shines when halibut are keyed on squid or small baitfish rather than chunk bait.
The tradeoffs come down to three things: hookup rate, release condition, and how much rigging complexity you want to deal with mid-trip. Slip-sinker rigs win on simplicity and release outcomes since circle hooks rarely gut-hook a fish. Reaper rigs win on conversion rate when the bite is finicky, but that conversion comes with a higher chance of a deep hook you’ll need to cut and release rather than fight to remove.
Slip-Sinker and Anchored Halibut Rigs: Build, Tie, and Fish
This is the rig most West Coast halibut trips are built around, and for good reason. A slip-sinker setup is quick to tie, easy to modify boatside, and does the one thing anchored fishing demands: it lets your bait sit still on the bottom while the sinker takes the abuse from current.
Parts you need:
- Sinker slide (or a straight-through egg sinker if you don’t have one)
- Plastic bead, sized to protect your knot from the sliding sinker
- Barrel swivel, rated at or above your leader test
- Leader material, 80 to 150 lb monofilament or fluorocarbon depending on how much abrasion the bottom throws at you
- Circle hook, 8/0 to 12/0 depending on bait size
- Chafe tube or short section of rubber tubing where the leader meets the swivel, if you’re fishing rocky or shell-covered bottom
How to assemble it: Thread your main line through the sinker slide, then the bead, then tie on your swivel with an improved clinch or Palomar knot. Attach your leader to the other end of the swivel, then crimp or tie your circle hook to the terminal end. Keep the leader length between three and six feet. Too short and you lose natural bait movement; too long and you’ll tangle on the drop in current.
The most common assembly mistake is skipping the bead. Without it, the sliding sinker will saw through your knot over a few drops, and you won’t notice until a big fish snaps it clean off.
Sinker weight depends entirely on depth and current. In 100 to 150 feet with light current, a 12 to 16 ounce sinker holds bottom fine. Push past 200 feet or fish a strong tide swing and you may need 24 to 32 ounces just to feel bottom contact. Sinker slides make weight changes fast, which matters when the tide turns mid-drop and your 16 ounce ball suddenly won’t hold.
Circle hooks are the standard here because the rig is fished passively. You set the rod in the holder, the fish takes the bait and turns, and the circle hook rolls into the corner of the jaw on its own. No hookset needed. It’s the reason anchored halibut anglers see fewer gut-hooked fish than any other rigging style.
Pro Tip: Carry pre-tied leaders in two or three lengths before you leave the dock. Retying a leader on a rolling boat in 40-degree wind is nobody’s idea of fun, and it costs you fishing time when the bite window is short.
Drift Rigs and Jigging Rigs: Leader Length, Hook Type, and Presentation
Drifting and jigging both demand a shorter, more direct connection between you and the bait than an anchored slip-sinker rig. The logic is simple: when the boat is moving, a long leader just means more slack, more tangles, and slower bite detection.
Drift rig components: Same basic structure as a slip-sinker setup, but the leader shrinks to 18 to 30 inches instead of three to six feet. That short leader keeps your bait tracking close to the sinker as the boat moves with wind or current, which matters because a long leader will swing wide and snag structure you’re trying to drift past. Bait rigs built this way often use two hooks in tandem when fishing a whole herring, one through the nose and a trailing hook near the tail, since halibut frequently attack from behind and miss a single-hook setup entirely.
Jigging setups drop the sinker slide altogether. You’re fishing a metal jig, a hair jig, or a lead-head with a plastic tail on a direct connection or a very short leader, sometimes with a small spreader bar to keep the jig from fouling on the main line during the drop. Leader test in the 60 to 100 lb range is common here; you don’t need the stretch or abrasion buffer a longer leader gives, because you’re actively working the rod rather than waiting on a bite.
Hook choice flips when you switch from bait to jig. Circle hooks work well passively but actually cost you hookups when jigging, because a circle hook needs a fish to turn away from you before it seats. Jigging is an active hookset, so J-hooks win here. You feel the thump, you sweep the rod, and a J-hook drives home immediately.
Locating the strike zone while drifting or jigging comes down to watching your sounder and paying attention to where you get bumps versus solid takes. A few tactics that consistently work:
- Count your jig down and note the depth of each bite, adjusting your next drop to hit that zone faster.
- Slow your drift speed with a drift sock if bites are coming short or halfhearted.
- Work the jig in sharp, short lifts rather than long sweeps. Halibut react to erratic movement more than a smooth retrieve.
Trap and Reaper Rigs: Construction and Ethical Considerations
When halibut are biting short, nipping bait without ever finding a hook, the Reaper rig solves a problem no other setup on this list handles as well. It’s built specifically to catch fish that would otherwise strip your bait clean off a standard slip-sinker rig.
Tying order for a single-hook trap rig:
- Tie a heavy mono or fluorocarbon leader, 135 to 150 lb test, to your swivel.
- Slide a glow Corkie or scent tube onto the leader ahead of the hook for added attraction.
- Attach a large J-hook, sized 9/0 to 11/0, at the terminal end.
- Thread your bait, often a whole herring or a chunk of salmon, so the hook rides near the tail where short-strikers typically attack.
For a two-hook trap variant, add a second, smaller trailing hook further down the leader beyond the primary hook, giving you coverage for fish attacking from multiple angles on the same bait. Sliding trap rig designs accomplish something similar with an adjustable trailing treble that slides along the leader, letting you position it exactly where short-strikers are hitting.
The tradeoff is real and worth stating plainly: large J-hooks in this size range convert more strikes into hooked fish, but they also raise your odds of a deep hook. If you feel a fish take deep and can’t get the hook out cleanly within a few seconds, cut the leader as close to the hook as you can reach and release the fish rather than dig for a hook that isn’t coming out easily. A cut leader corrodes quickly in saltwater and gives the fish a real shot at survival.
Pro Tip: Watch your rod tip before you commit to a trap rig. Repeated light taps without a solid load usually mean short-strikers are working the area, which is exactly when this rig outperforms a standard slip-sinker setup.
Pick this rig when you’re marking fish but not connecting, or when your deckhand starts pulling up bait with bite marks and no hook contact. That’s the tell.
Hoochie and Hair-Jig Rigs for Isolated Flats and Picky Fish
Small, isolated patches of structure call for a different kind of presentation than a big drift or a wide anchor spread. When you’re working a tight pocket where halibut are holding tight to a specific piece of bottom, a hoochie or hair-jig gives you precision that a bulky bait rig can’t match.
These streamlined setups drop faster, drift less on the way down, and let you work a small target repeatedly without the drag a whole herring creates. That matters when your window on a productive spot might be a handful of drops before the boat swings off it.
To rig a squid skirt or hoochie, slide the skirt over a jig head or a hook shank, tuck a strip of herring or squid inside the skirt for scent, and secure it with a rubber band or a light wrap of thread. The bait doesn’t need to look perfect. It needs to smell right and move naturally on the drop.
- Keep the leader short, generally under two feet, so the skirt tracks close to your sinker and doesn’t swing wide on the fall.
- Pair a lighter sinker than you’d use on a straight bait rig. Skirted presentations create less resistance, so you don’t need as much weight to reach bottom in the same current.
- Add a glow bead or a small rattle above the hook if you’re fishing deeper or off-color water where visibility drops fast.
- Swap from bait to a hoochie when you’re marking fish that won’t commit to a full bait spread. Halibut keyed on squid often respond better to a smaller, moving target than a stationary chunk of herring.
Terminal Tackle Guide: Hooks, Leaders, Crimps, Swivels, and Glow Gear
Every rig on this page comes down to the same handful of components. Get these right and you can build any halibut rig from memory once you’ve tied it a few times.
Hooks: Circle hooks in 8/0 to 12/0 are the standard for passive, anchored fishing because they reduce gut-hooking and seat naturally in the corner of the jaw. J-hooks in 9/0 to 11/0 take over for jigging and trap rigs, where you’re actively setting the hook or maximizing short-strike conversion.
Leader material: Monofilament and fluorocarbon both work. Mono has more stretch, which helps absorb a hard headshake from a big fish. Fluorocarbon resists abrasion better against rocky bottom. Commercial pre-tied rigs commonly spec 100 to 200 lb leader, and that range holds up whether you’re building a slip-sinker or a Reaper setup.
Crimps, swivels, and glow components:
- Use a crimping tool sized to your leader diameter, not a generic pair of pliers. A loose crimp is the single most common point of failure on a halibut leader.
- Ball-bearing swivels rated well above your leader test prevent line twist on long drops and hard fights.
- Premium swivels and crimps matter more on trap rigs, where the extra leader length and heavier hooks put more torque on every connection point.
- Glow beads, Corkies, and scent tubes add visibility and attraction in deep or off-color water. They’re cheap insurance on a rig that’s otherwise identical to a plain bait setup.
Current and depth dictate sinker size more than anything else. In calm water under 100 feet, 8 to 12 ounces often holds bottom fine. Push into 200-plus feet with a strong tide, and you may need 24 ounces or more just to stay in contact. A rough rule many charter crews use: check your line angle off the rod tip, and if it’s swinging past 45 degrees, size up your sinker before you lose the bottom entirely.
Knots, Crimps, and the Step-by-Step Tying Sequence
Tying a halibut rig on a rocking boat is a different experience than tying one at your kitchen table. Build muscle memory at home so you’re not fumbling with cold hands offshore.
- Start with your main line to swivel connection. An improved clinch knot or a Palomar knot both hold well on the swivel eye.
- Attach your leader to the swivel, either with a second clinch knot or a loop-to-loop connection if you’re using pre-made leader sections.
- For two-hook bait rigs, use a snell knot to attach your trailing hook directly to the leader shank. It’s the strongest connection for a hook that will take direct pressure from a big fish thrashing at boatside. Bass Angler Magazine’s snell knot tutorial walks through the wraps step by step if you want a visual reference before you try it cold.
- If you’re crimping instead of tying, slide your crimp sleeve onto the leader, pass it through the hook eye, and back through the crimp before compressing it fully with a rated crimping tool.
- Inspect every crimp before it goes in the water. Squeeze it gently and look for even compression with no visible gaps. A crimp that looks flattened on one side and loose on the other will fail under load.
Tool checklist: crimping tool, side cutters, a small pair of needle-nose pliers, spare crimps in two sizes, and a handful of pre-cut leader sections in your most common lengths. Run through this checklist before every drop, not just at the start of the day. A leader that’s been abraded on one rocky bottom pass needs to come off before you send it back down.
Choosing the Right Rig for the Conditions in Front of You
Most rigging decisions come down to three questions: how is the boat moving, how deep are you, and what’s biting. Answer those and the rig picks itself.
- If you’re anchored and fishing sand or mud bottom, tie a slip-sinker rig with a circle hook.
- If the boat is drifting with wind or tide, shorten your leader to 18 to 30 inches and stick with bait or a hair-jig.
- If you’re jigging metal or plastic on a short leader, switch to a J-hook since you’re setting it yourself.
- If halibut are short-striking and stealing bait without hookups, tie on a Reaper or trap rig and accept the higher deep-hook risk that comes with it.
- If you’re working a small, isolated patch of structure, drop a hoochie or hair-jig for a lighter, more precise presentation.
Before you tie up for the day, ask the captain or crew what the bottom composition looks like and how the current’s expected to run over the next few hours. That single conversation saves you from rigging heavy leader for a sandy flat or light leader for a rock pile that’ll shred it on the first drift.
Watch for two red flags constantly: leader abrasion and deep-hooking risk. Run your fingers down the leader every few drops, feeling for rough or fuzzy spots that signal it’s been dragged across structure. If you’re getting deep hooks repeatedly on a trap or Reaper rig, that’s a signal to switch to a circle-hook setup, even if it costs you a strike or two, because fish survival matters more than a marginal bump in hookup rate.
Safety Tips for Handling Halibut Rigs and Hooks
Halibut hooks are large, and halibut themselves can weigh well over 100 pounds and thrash hard boatside. That combination makes rig handling one of the more overlooked safety issues on a bottomfishing trip.
Keep rigged rods pointed away from other anglers when you’re setting up or stowing gear, especially with 9/0 to 11/0 hooks on a Reaper rig. A hook that size catches skin as easily as it catches fish. Store rigged leaders in a dedicated rig wallet or a foam-lined box rather than loose in a bucket, where hooks tangle and someone reaches in blind.
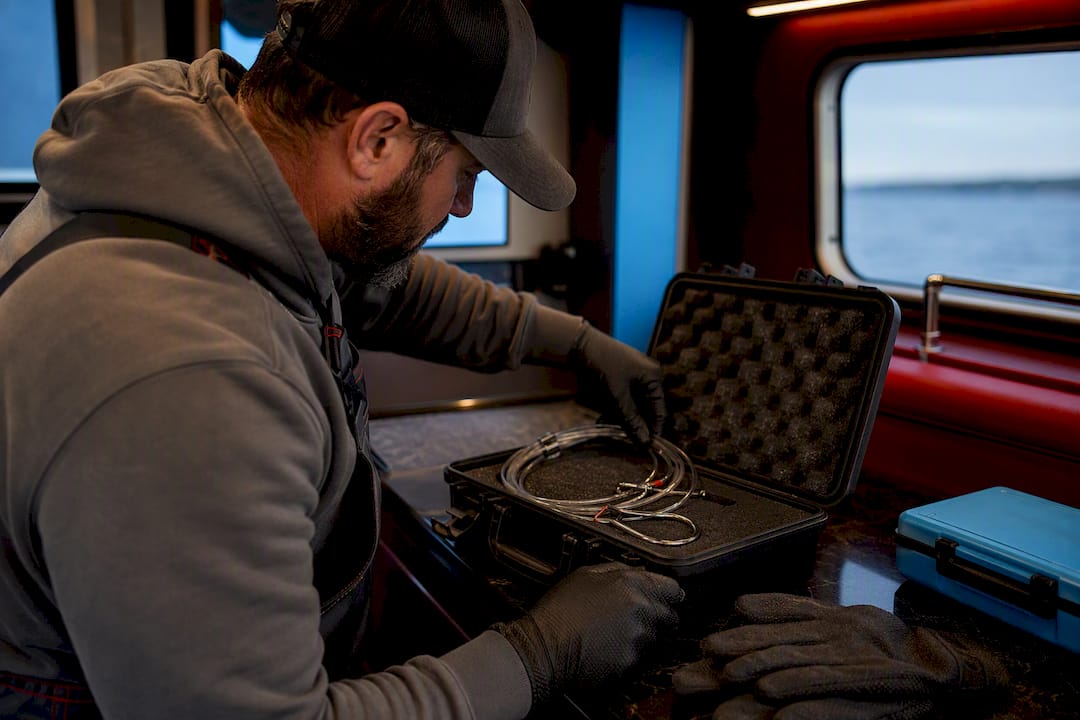
When a fish comes boatside, never lead with your hands. Use a gaff or a net designed for large fish, and keep everyone’s hands clear of the hook until the fish is secured and calm. A halibut’s tail can generate enough force to snap a rod or knock someone off balance on a rolling deck.
If a fish is deep-hooked and you’ve decided to cut it loose, cut the leader as short as you safely can reach, and keep your fingers away from the hook point while you do it. A thrashing fish with an exposed hook near the surface is one of the more common ways anglers get hooked themselves. Wear gloves when handling leaders and hooks in cold water, both for grip and for a layer of protection if a hook shifts unexpectedly during release.
Why These Rigs Work: A Field-Tested Perspective
The gap between what most rigging guides describe and what actually produces fish on the West Coast comes down to matching rig complexity to conditions, not chasing the fanciest setup. High Class Tackle Co. builds terminal gear around exactly this principle, informed by seasons spent anchored, drifting, and jigging across Pacific coastal grounds where conditions change by the hour. The slip-sinker rig gets dismissed as basic, yet it out-fishes flashier setups more often than anglers expect. For deeper builds on bottomfishing rigs and bait presentation, our saltwater bottom fishing guide and cut plug herring rigging walkthrough cover techniques that carry directly into halibut work.
— Nick
Gear Up: Terminal Tackle for Every Halibut Rig on This List
Tying a great rig starts with parts that don’t fail under a 100-pound fish, and that’s where a lot of anglers get burned buying bargain-bin crimps and swivels. Highclasstackleco built its terminal tackle and components line specifically for anglers who want gear rated for real saltwater loads, not just labeled for it.

If you’re building slip-sinker rigs, start with quality swivels, chafe tubing, and circle hooks from that same collection. Trap and Reaper builds need heavier hardware, so pair large J-hooks with premium crimps and abrasion-resistant leader before your next trip. Want the terminal gear sorted without hunting through a dozen bins? The component tackle box bundles the pieces most of these rigs call for in one kit, so you can tie up dockside instead of digging through your truck. Browse the collection and get your rigs built before the next tide window opens.
Sources
- The Reaper: Halibut Rigging - Fish Alaska Magazine
- Halibut Fishing Rig - Rambling Angler Outdoors
- Halibut Bait Rigs - Salmon University
- Sliding Halibut Rig with BKK® Hooks - P-Line
0 comments